


DIY electric motorcycle mods: Your performance upgrade guide
Factory-stock electric motorcycles are built for the middle of the road, literally and figuratively. Manufacturers lock down controllers, cap torque curves, and ship bikes with conservative settings that leave serious performance on the table. If you’ve ever twisted the throttle and felt like the bike was holding back, you’re right. The good news is that with the right mods, the right tools, and a methodical approach, you can unlock real gains in torque, top speed, handling, and style without sending your bike to a shop. This guide covers everything from your first tool purchase to verifying actual results after the build.
Table of Contents
- Essential tools and parts for DIY mods
- Choosing the right mods: Popular upgrades and their impact
- Step-by-step: Installing and tuning your upgrades safely
- Verification, troubleshooting, and real-world results
- The hidden art of DIY electric motorcycle modding: Why measuring and tuning are everything
- Get the best parts for your electric motorcycle mods
- Frequently asked questions
Key Takeaways
| Point | Details |
|---|---|
| Preparation is critical | Having the right tools, safety gear, and background knowledge ensures a smooth start to DIY electric motorcycle modifications. |
| Mod selection impacts results | Choosing compatible, high-value upgrades shapes your performance, safety, and riding experience more than chasing highest specs. |
| Precise tuning matters | Success depends as much on calibrating controllers and verifying parameters as on installing powerful hardware. |
| Test and benchmark each change | Measuring and comparing real-world outcomes after each upgrade keeps you safe and maximizes gains. |
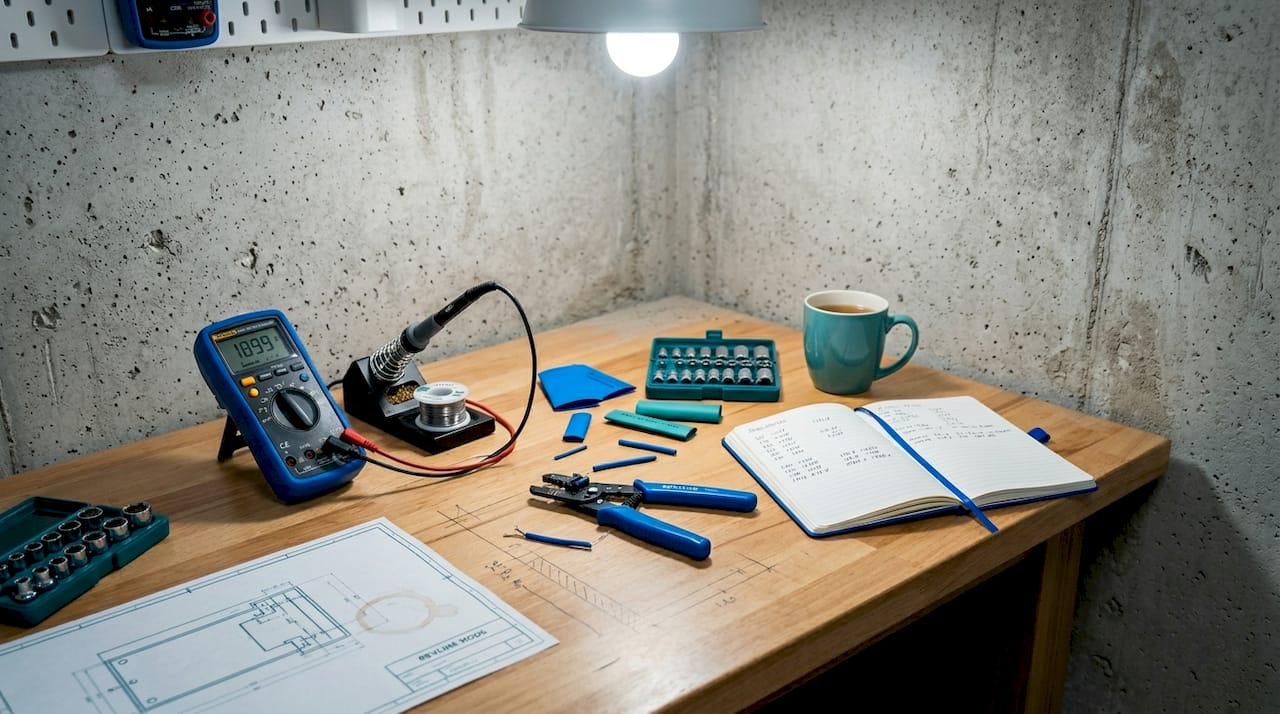
Essential tools and parts for DIY mods
Ready to dive in, let’s detail what you’ll need on-hand before touching your bike. The biggest mistake first-time modders make is underestimating how much setup work happens before a single bolt turns. Getting your workspace and toolkit right saves you from fried components, wasted money, and frustrating setbacks.
Your core electrical toolkit needs to include a quality multimeter for voltage and resistance checks, a soldering iron with flux and heat-shrink tubing, a torque wrench for mechanical fasteners, a crimping tool for reliable connector terminations, and a laptop loaded with firmware tools like VESC Tool or manufacturer-specific software. Skipping any of these is not a shortcut. It’s a liability.
| Tool or Part | What It Does | Performance Impact |
|---|---|---|
| Multimeter | Measures voltage, current, resistance | Prevents wiring errors and component damage |
| Soldering iron | Creates reliable electrical connections | Ensures signal and power integrity |
| Torque wrench | Applies correct fastener tension | Prevents mechanical failure under load |
| Crimper | Terminates connectors cleanly | Avoids arcing, overheating, shorts |
| Laptop with firmware | Adjusts controller parameters | Directly affects throttle, torque, and power modes |
| Aftermarket controller | Replaces stock ECU limits | Speed, torque, and mode unlocks |
| Upgraded battery pack | Increases voltage or capacity | Range and peak power gains |
| High-performance motor | Raises output ceiling | Top speed and torque improvement |
| Braided brake lines | Reduces flex under pressure | Sharper, more consistent braking feel |
Before you plug anything in, suit up properly. Safety gear for your workspace is not optional.
- Insulated gloves rated for high-voltage DC work
- Safety glasses for soldering and battery handling
- A fire extinguisher rated for electrical fires within arm’s reach
- A clean, dry workspace free of metal debris and moisture
- Disconnected battery pack before any electrical work begins
- A second person nearby when working with high-voltage systems
Critical note: As the Endless Sphere VESC tuning community makes clear, controller upgrades and remapping are a major performance lever covering throttle response, torque limits, and power modes, but DIY modders must avoid unsafe parameter changes. VESC and FOC tuning require correct electrical measurements including inductance and shunt implementation, and these setups can be highly sensitive to even small errors.
If you’re newer to electric vehicle terminology, the motorcycle terminology glossary at Revline Mods is a solid starting point to get your bearings before diving into firmware. Staying current on electric vehicle repair trends also helps you understand where the DIY community is heading and what tools are becoming standard practice.
Choosing the right mods: Popular upgrades and their impact
With your toolkit set, it’s time to pick the mods that will transform your bike and avoid choices that could backfire. Not every upgrade delivers equal value, and some popular mods require careful integration or they’ll cause more problems than they solve.
Here’s how the most common upgrades stack up:
| Mod | Estimated Cost | Difficulty | Typical Gain | Key Caveat |
|---|---|---|---|---|
| Controller remap | $50 to $300 | Medium | 10 to 25% torque boost | Requires correct parameter setup |
| Motor swap | $200 to $800 | High | 15 to 30% power increase | Must match controller specs |
| Battery upgrade | $300 to $1,200 | Medium to High | Range +20 to 40% | Voltage must match system |
| Throttle upgrade | $30 to $100 | Low | Smoother response | Sensor compatibility matters |
| Wheelset upgrade | $150 to $500 | Low to Medium | Handling and grip | Axle spacing and brake mount fit |
| Brake line upgrade | $60 to $180 | Low | Shorter stopping distance | Bleed procedure required |
| Shock guard/fender | $20 to $80 | Very Low | Protection and aesthetics | Minimal performance impact |
As benchmarking data from DIY EV forums confirms, empirical results from controller, battery, and motor combos are highly sensitive to voltage levels, current limits, motor type, and measurement method. A 5% to 10% power gain from one setup can look completely different on a different bike with different baseline parameters.
Here’s how to prioritize mods by riding goal:
- Speed: Controller remap combined with a higher-voltage battery pack
- Torque: Motor swap with matched controller and shunt calibration
- Handling: Wheelset upgrade with quality tires and suspension tuning
- Safety: Braided brake lines, upgraded rotors, and fresh pads
- Style: Shock guards, custom fenders, and colored hardware accents
Correct integration is just as important as the hardware itself. A premium motor paired with a mistuned controller will underperform a stock motor with a properly calibrated system. For deeper guidance on hardware selection, the electric bike hardware upgrades guide covers integration specifics that most product listings skip entirely. If you’re building for trail riding, the off-road enhancement tips article is worth reading before you finalize your parts list.
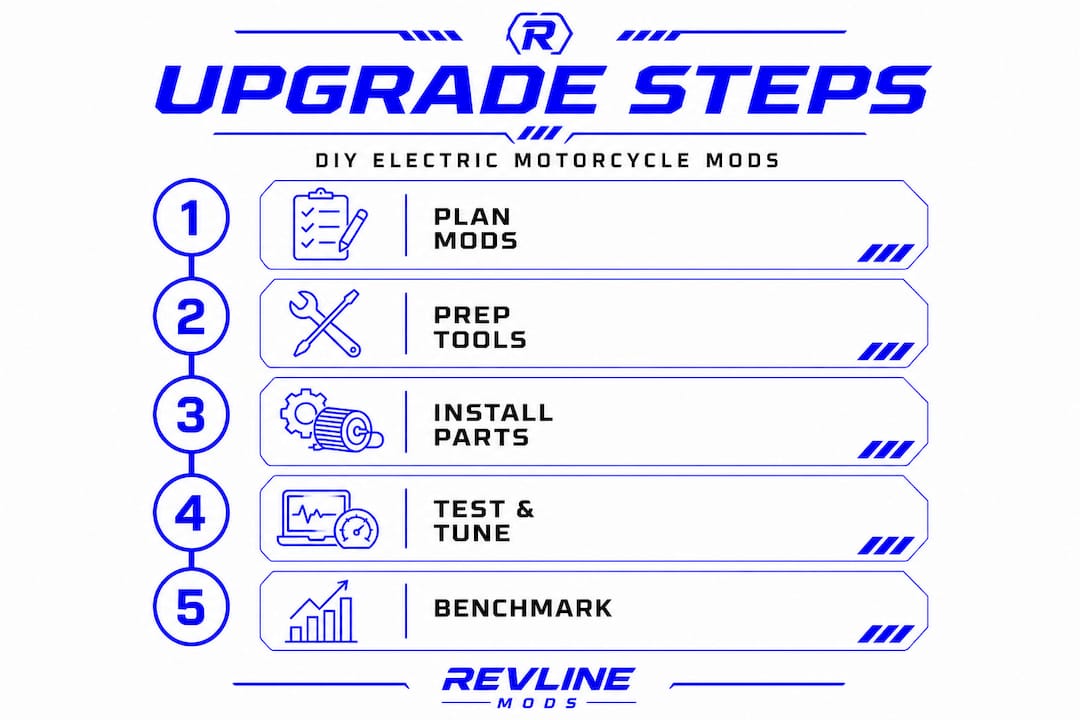
Step-by-step: Installing and tuning your upgrades safely
Equipped with your chosen upgrades, let’s break down the process so every install goes right the first time. Rushing the installation phase is where most DIY builds go wrong. A methodical approach protects your hardware and your safety.
- Disconnect all power sources. Remove the battery pack completely and wait at least five minutes before touching any electrical components. Residual charge in capacitors can still cause damage.
- Install mechanical hardware first. Wheels, brakes, and fenders go on before any electrical work. Torque all fasteners to spec using your torque wrench.
- Mount the new controller or motor. Confirm physical fitment and secure mounting points before connecting any wiring.
- Verify all specs before wiring. Cross-reference voltage ratings, current limits, and connector types between your new hardware and the rest of the system.
- Route and connect wiring carefully. Use proper connectors, heat-shrink all solder joints, and secure wiring away from moving parts and heat sources.
- Set initial parameters conservatively. When using VESC Tool or similar firmware, start with lower current limits and work up gradually. Never start at maximum values.
- Run motor identification. Most modern controllers have an auto-detect routine that measures motor inductance and resistance. Complete this before any riding.
- Perform a stationary functional test. Reconnect power, check for error codes, verify throttle response at low input, and confirm braking function before moving.
- Conduct a controlled first ride. Keep speeds low and test all systems in a safe, open area before pushing any limits.
Pro Tip: Double-check shunt installations and sensor wiring before powering up. A misrouted shunt or reversed hall sensor wire can fry your controller instantly, and these mistakes are almost always invisible to the eye until it’s too late.
From the VESC tuning community: Measurement hardware and control-loop parameters, especially current sensing, shunt behavior, and motor identification parameters in VESC, can make or break system stability. Getting these right matters more than the hardware brand you chose.
For brand-specific nuances in tuning Surron, Talaria, or 79Bike platforms, the hardware tuning steps guide breaks down the differences you need to know before adjusting firmware on each platform.
Verification, troubleshooting, and real-world results
Once your upgrades are in, real results matter. Here’s how to spot gains, fix hiccups, and validate benchmarks properly. Skipping verification is how riders end up with mods that underperform or fail within a few rides.
Start with these basic verification checks after every install:
- Measure battery voltage under load during a short, controlled ride. Voltage sag tells you whether your battery is handling the new power demand.
- Confirm throttle response is linear and predictable across the full range, not jerky or delayed.
- Test braking at low speed before high-speed runs. New brake lines or pads need a bedding-in period.
- Listen for unusual motor sounds: grinding, clicking, or high-pitched whining can indicate sensor or timing issues.
- Check all connectors for heat after the first ride. Warm connectors are normal. Hot connectors indicate a problem.
When things go wrong, work through this troubleshooting sequence:
- Error codes on display: Log the code, cross-reference with your controller’s documentation, and check the related wiring harness before changing any parameters.
- Wobbly or inconsistent power delivery: Usually a hall sensor issue or a loose phase wire. Inspect all motor connections before retuning.
- System lockout after a mod: Reset to factory defaults, re-run motor identification, and rebuild parameters from scratch. Trying to tune over a corrupted baseline rarely works.
- Overheating controller: Check current limit settings. You may have set phase current too high for your motor’s thermal rating.
Pro Tip: Always benchmark your setup in the same mode, the same battery state of charge, and the same road conditions every time you test. Reported peak power and top speed claims in the DIY community often vary wildly because riders test at different battery levels, in different ride modes, and on different terrain. Your own consistent data is more valuable than any forum post.
Power and speed results depend on the entire electrical system working together, not just the single component you upgraded. A new motor running on an undersized battery through a stock controller will never show you what that motor can actually do. For riders focused on stopping power as a safety baseline, advanced brake upgrades are one of the highest-return investments you can make before pushing performance limits.
The hidden art of DIY electric motorcycle modding: Why measuring and tuning are everything
Here’s the part most guides skip because it’s less exciting than talking about horsepower numbers. The real dividing line between DIY builds that perform and builds that disappoint is not the parts list. It’s the quality of measurement, the discipline of tuning, and the honesty of benchmarking.
We see this constantly in the community. A rider drops serious money on a new motor and controller, installs everything correctly by the book, and then reports gains that barely move the needle. Meanwhile, another builder with a similar setup reports a 20% improvement. The difference is almost never the hardware. It’s whether they correctly identified motor parameters, calibrated the shunt, and tested under controlled conditions.
The DIY benchmarking reality is that real-world gains are about setup and detail, not spec sheets. A 35kW motor means nothing if the controller is current-limited to half its potential or the battery sags under load. Yet forum posts routinely cite peak specs without mentioning any of these variables.
This matters for the community as a whole. When builders share results without documenting their test conditions, voltage levels, ride mode, and parameter settings, the knowledge base gets polluted with claims that nobody can replicate. The builders who actually advance the community are the ones who share their full setup files, their measurement methodology, and their honest before-and-after data.
Our perspective at Revline Mods is that the most underrated skill in this hobby is patience with the tuning process. Rushing from install to wide-open-throttle testing skips the steps that actually make upgrades work. Understanding the brand lingo around FOC, ERPM, and phase current is not just academic. It’s the foundation of every tuning decision you’ll make.
If you want your build to actually deliver, invest as much time in learning your firmware as you do in choosing your hardware. The riders who get the most out of their machines are the ones who treat tuning as a craft, not an afterthought.
Get the best parts for your electric motorcycle mods
With the know-how and test results in hand, here’s where to source proven, compatible upgrade parts for your build. Having a solid process means nothing if the parts you’re installing are poorly made or incompatible with your platform.

At Revline Mods, we stock components specifically chosen for electric motorcycle platforms including Surron, Talaria, and 79Bike builds. If braking is your first priority, the premium e-bike brakes in our catalog are tested for compatibility with the most popular platforms and deliver the stopping confidence you need before pushing performance limits. For riders focused on handling and traction, our durable wheelsets are built to handle upgraded power outputs without flex or reliability issues. And if you want to protect your suspension while adding a clean visual upgrade, our shock protection fenders in carbon fiber deliver both function and style in one piece.
Frequently asked questions
What are the safest first mods for a DIY electric motorcycle?
Upgrading brakes, tires, or suspension offers meaningful performance improvement with much lower electrical risk compared to controller remaps or battery swaps, making them ideal starting points for new DIY builders.
How do I avoid damaging my controller during tuning?
Always confirm your electrical measurements before changing parameters. As VESC tuning documentation makes clear, incorrect shunt calibration or timing settings can cause instability or permanent controller failure even at conservative power levels.
Why do some DIY mod claims about power or speed vary so much?
Benchmarked performance depends on the full electrical setup including voltage, current limit, motor type, and test conditions. Reported peak power claims in the community often reflect best-case scenarios that don’t transfer to different builds or conditions.
What should I do if my bike locks out or shows error codes after a mod?
Reset to factory defaults, re-run motor identification, and rebuild your parameter settings from a clean baseline. Trying to tune over corrupted or mismatched settings almost always makes the problem worse before it gets better.
Are aftermarket suspension kits compatible with all electric motorcycles?
Many retrofit kits fit custom and older model platforms, but they may not integrate cleanly with OEM onboard electronics or ride-by-wire systems. Always verify axle spacing, mounting geometry, and electronic compatibility before purchasing.