


Electric Motorcycle Lighting Upgrade Process: 2026 Guide
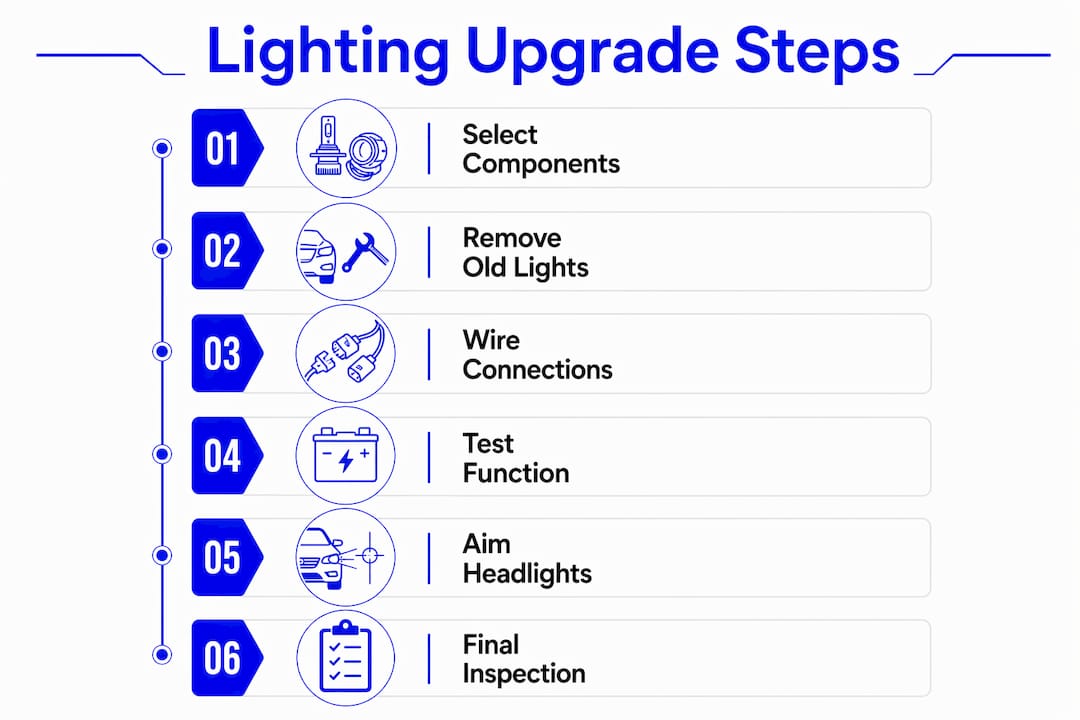
The electric motorcycle lighting upgrade process is a structured workflow covering component selection, wiring, aiming, and configuration to improve visibility, safety, and aesthetics on your bike. Modern LED systems like the Supernova M99 Pro 2 and Sealight S7S deliver measurably better output than stock halogen units, and the gap widens further when you factor in the integrated motor systems common on Surron, Talaria, and 79Bike platforms. Done right, this upgrade touches every layer of your electrical system. Done wrong, it can trigger shutdowns, void warranties, or leave your beam pointed at the sky. This guide walks you through every stage.
What does the electric motorcycle lighting upgrade process require?
Before you touch a single bolt, you need the right tools and the right parts. Skipping this step is the single most common reason DIY lighting installs stall halfway through.
Essential tools for the job:
- Screwdrivers (Phillips and flathead, multiple sizes)
- Crimping pliers with flat plug sleeves
- Wire strippers
- Multimeter for voltage testing
- Heat shrink tubing and insulation tape
- Zip ties and cable management clips
Parts checklist:
- LED headlight unit compatible with your bike’s voltage (typically 48V or 72V)
- LED tail light and turn signals rated for your system
- Replacement connectors and crimp terminals
- Power Boost Connector cable (required for dual-input systems like Supernova on Bosch Smart System)
| Tool or Part | Purpose |
|---|---|
| Multimeter | Verify voltage and continuity before and after wiring |
| Crimping pliers | Secure flat plug sleeves on stripped cable ends |
| Heat shrink tubing | Seal and protect crimped connections from moisture |
| LED headlight unit | Primary lighting upgrade, voltage-matched to your bike |
| Power Boost Connector | Secondary power input for high-output integrated systems |
| Wire strippers | Clean cable preparation without nicking conductors |
Compatibility is the detail most riders underestimate. A headlight rated for a 36V system will underperform or fail entirely on a 72V platform. Check your bike’s nominal voltage, confirm the light’s input range, and verify connector types before ordering. For Surron and 79Bike owners, Revlinemods has a useful breakdown of component compatibility terms worth reading before you buy.
Pro Tip: Buy one extra set of crimp terminals and heat shrink sleeves. You will almost certainly need to redo at least one connection, and running out mid-install is a frustrating delay.
How to safely remove old lighting before the upgrade
Safe removal is not just about avoiding broken clips. It is about protecting the wiring harness you will reuse and preventing shorts that can damage your controller or battery management system.
- Disconnect the battery first. On most electric motorcycles, this means removing the main battery pack or flipping the main disconnect switch. Never work on lighting circuits with the system live.
- Photograph every connector before unplugging. Your phone camera is your best documentation tool. Capture the routing, the connector orientation, and any zip tie positions.
- Remove the headlight housing. Most OEM units are secured by two to four bolts. Support the unit as you remove the last bolt so it does not drop and stress the wiring.
- Unplug connectors carefully. Press the release tab fully before pulling. Forcing a locked connector is the fastest way to break a tab you cannot replace without a full harness.
- Inspect the wiring. Look for chafing, corrosion on terminals, or melted insulation. Any damaged section needs repair before you install new lights.
- Clean the connector contacts. Use electrical contact cleaner and a small brush. Corroded contacts increase resistance and reduce lighting performance even with brand-new LED units.
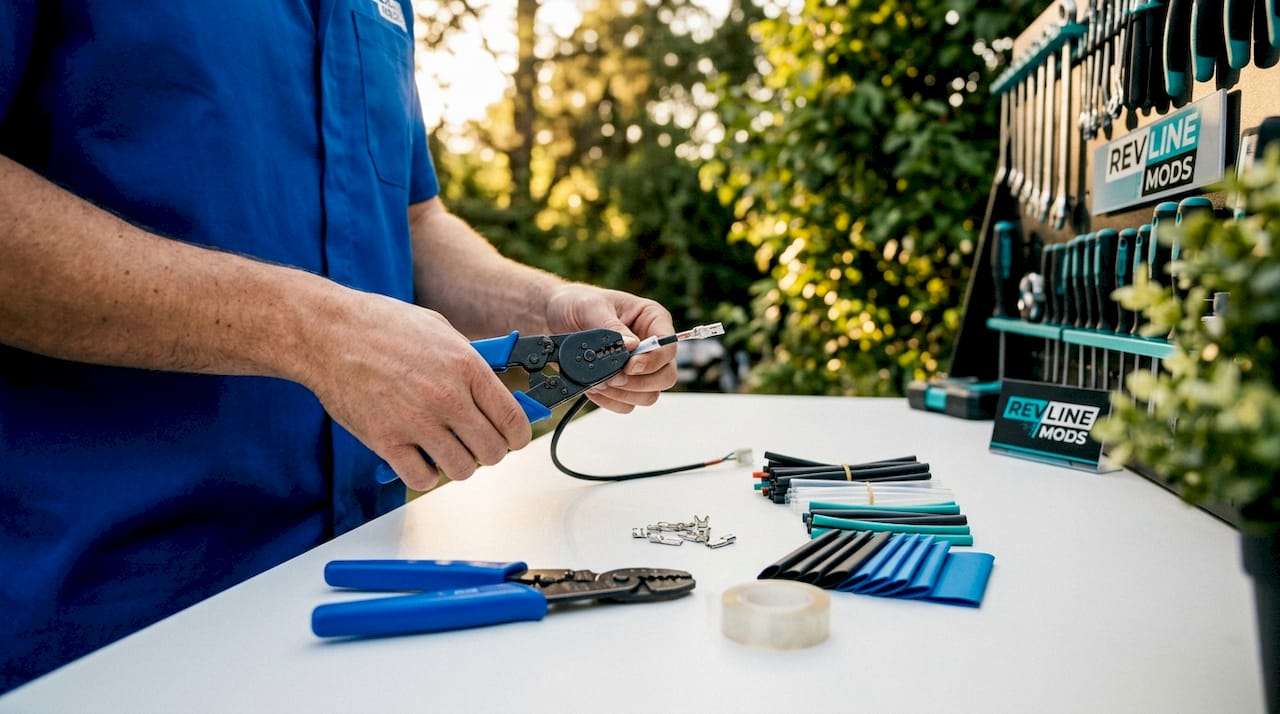
Proper cable preparation means crimping flat plug sleeves onto stripped ends and sealing them against moisture, a step that directly prevents voltage drops and corrosion failures down the road.
Pro Tip: Label each wire with a small piece of masking tape and a marker as you disconnect it. Color coding alone is unreliable once you have six or more wires loose on the bench.
Step-by-step installation and wiring of new LED lights
This is where the motorcycle lighting installation workflow gets specific. The steps below apply broadly, with callouts for integrated motor systems like the Bosch Smart System used on many premium e-bike platforms.
- Mount the headlight housing. Position it in the OEM bracket or your aftermarket mount. Leave at least 3 mm clearance behind all connectors for ventilation. Insufficient airflow causes heat damage to both the light and the connector housing.
- Route the main power cable. Run it away from moving parts, sharp edges, and heat sources. Use the original routing path where possible. Secure with zip ties every 150 mm.
- Connect the primary power input. Match polarity carefully. A reversed connection on a DC system will either blow a fuse or damage the light driver circuit.
- Install the Power Boost Connector (if required). High-output systems like the Supernova M99 Pro 2 require dual power wiring through a secondary cable routed to the motor system’s dedicated output port. This is not optional. Without it, the light runs at reduced output.
- Seal unused ports. Any connector port left open is a water ingress point. Use the rubber caps supplied with your light or source matching blanking plugs.
- Enter programming mode for one-time configuration. Integrated systems require you to select the correct light mode for your motor. The Supernova M99 Pro 2, for example, uses a maintenance mode sequence to set the appropriate profile for Bosch LPP or HPP motors. Skipping this step causes the system to default to an incompatible mode.
- Reconnect the battery and test. Verify the light powers on, cycles through modes correctly, and shows no fault codes on your display.
Wiring approach comparison by motor system:
| Motor system | Primary power source | Secondary input needed | Programming required |
|---|---|---|---|
| Bosch Smart System | Motor unit port | Yes, Power Boost Connector | Yes, maintenance mode |
| Generic 48V system | Battery harness tap | No | No |
| Surron/Talaria direct | Controller output | No | No |
| 79Bike integrated | Dedicated lighting port | Depends on light model | Sometimes |
Pro Tip: Before sealing any connections with heat shrink, power the system on briefly and confirm the light functions. Fixing a wiring error through heat shrink is significantly harder than catching it before you apply heat.
LED headlights like the Sealight S7S deliver double the visibility distance of stock halogen units with a wider beam pattern and no glare complaints from oncoming riders. That performance gain only materializes if the wiring is clean and the connections are solid.
How do you aim upgraded electric motorcycle headlights correctly?
Correct aiming is the step most DIY installers skip, and it is the step that determines whether your upgrade actually improves safety or just looks good in the garage. FMVSS 108 standards require on-vehicle aim testing under real load conditions, not a static bench adjustment.
Follow this procedure after installation:
- Load the bike as you normally ride it. Sit on the seat with your typical gear. Add any cargo you regularly carry. Aiming without load produces a beam that points too high under real conditions.
- Park on a flat surface 25 feet from a wall or garage door. Mark the center of the headlight height on the wall with tape.
- Observe the beam cutoff line. The light-dark boundary should fall at or slightly below the tape mark. According to the KTM owner’s manual standard, the cutoff should land exactly on the lower marking with rider and load onboard.
- Adjust using the aim screw. Most LED headlight units include a vertical adjustment screw on the housing. Turn clockwise to raise the beam, counterclockwise to lower it.
- Recheck from the riding position. Dismount, remount, and verify the cutoff has not shifted. Suspension sag under load can move the beam slightly.
| Aiming checkpoint | Correct result |
|---|---|
| Rider and load onboard | Yes, always |
| Surface | Flat, level ground |
| Distance to wall | 25 feet |
| Beam cutoff position | At or just below marked height |
| Adjustment tool | Vertical aim screw on housing |
Load-dependent aiming is not a suggestion. A beam aimed too high blinds oncoming traffic. A beam aimed too low cuts your visibility range in half.
Troubleshooting common issues after the lighting upgrade
Even a careful install can produce problems. Here are the most frequent issues and their fixes.
Common problems and solutions:
- Light powers on but shuts down after a few seconds. This almost always means incorrect programming mode or a wrong LPP/HPP connection on Bosch-integrated systems. Re-enter maintenance mode and reselect the correct motor profile.
- Flickering or dim output. Check crimp connections first. A loose or poorly crimped terminal creates resistance that drops voltage to the driver circuit. Restrip and re-crimp any suspect connection.
- Connector feels hot after riding. You have either undersized wiring for the current draw or insufficient clearance behind the connector housing. Verify wire gauge against the light’s rated amperage and recheck mounting clearance.
- Beam pattern looks uneven or has a dark spot. The LED module may not be seated correctly in the housing. Remove the unit, reseat the module, and recheck alignment.
- Turn signals flash too fast or too slow. LED turn signals draw far less current than halogen. If your bike uses a load-dependent flasher relay, replace it with an LED-compatible electronic relay.
Pro Tip: After your first 50 miles of riding, pull the headlight connector and inspect it for heat discoloration. Catching a marginal connection early prevents a failure on the road.
Integrated lighting systems on electric motorcycles increasingly require software configuration for optimal performance. Treating the programming step as optional is the most expensive mistake you can make after spending money on quality hardware.
Key takeaways
A successful electric motorcycle lighting upgrade depends on matched components, clean wiring, load-based aiming, and motor-specific programming completed before the first test ride.
| Point | Details |
|---|---|
| Compatibility first | Match LED voltage and connector type to your specific bike platform before purchasing. |
| Crimp and seal every connection | Crimped flat plugs with heat shrink prevent moisture ingress and voltage drop failures. |
| Program integrated systems | Bosch Smart System and similar platforms require maintenance mode configuration or the light will shut down. |
| Aim under real load | Sit on the bike with normal cargo before adjusting the beam cutoff to meet safety standards. |
| Inspect after first ride | Check connectors for heat and recheck aim after 50 miles to catch early issues. |
What I have learned doing these upgrades on electric bikes
The part nobody warns you about is the programming step. You can do a flawless mechanical and electrical install on a Supernova M99 Pro 2, get everything seated perfectly, and still have the system shut down 10 seconds after power-on because the motor profile was never set. I have seen riders assume the light is defective and return it. It was never defective. The maintenance mode sequence takes about two minutes once you know it exists.
The other thing I would push back on is the idea that aiming is a finishing touch. It is not. It is a safety-critical calibration that belongs in the same category as brake bleeding. A misaimed beam on a dark road either blinds the car coming toward you or leaves you with 30 feet of visibility at speed. Neither outcome is acceptable. The aesthetic and safety benefits of LED lighting only pay off when the beam is pointed correctly.
My honest recommendation: read the manufacturer’s installation tutorial completely before you start, not while you are mid-install with wires hanging loose. For Surron and 79Bike owners specifically, the DIY upgrade guides at Revlinemods cover platform-specific wiring details that generic tutorials miss entirely. Invest in quality parts, take the programming step seriously, and aim the light properly. Everything else is just turning bolts.
— Revline
Upgrade your electric motorcycle with Revlinemods
Revlinemods stocks aftermarket parts built specifically for Surron, Talaria, and 79Bike platforms, so you are not adapting parts designed for a different machine.

If you are planning a full front-end refresh alongside your lighting upgrade, the RevLine Front Plate gives you a clean mounting surface for headlight brackets and accessories without drilling into your frame. For riders who want to go further, the 79 Bike Black Out Kit bundles lighting-compatible styling components into a single package. Revlinemods ships fast, stocks parts for the platforms you actually ride, and offers the kind of niche-specific selection that general powersports retailers cannot match. Browse the full catalog at revlinemods.com.
FAQ
What LED lights work best for electric motorcycle upgrades?
LED units rated for your bike’s nominal voltage (48V or 72V) with a beam pattern designed for road use deliver the best results. The Supernova M99 Pro 2 and Sealight S7S are proven options with documented real-world performance gains over stock halogen.
Do I need to program my new LED headlight after installing it?
Only if your bike uses an integrated motor system like the Bosch Smart System. These platforms require a one-time maintenance mode configuration to set the correct motor profile, or the light will shut down shortly after power-on.
How do I know if my headlight is aimed correctly?
Park 25 feet from a flat wall with the rider and normal load onboard. The beam cutoff line should fall at or just below the marked headlight height. Adjust the vertical aim screw until the cutoff is correct, then recheck from the riding position.
Can I upgrade just the headlight or do I need to replace all lights at once?
You can upgrade individual lights independently. Many riders start with the headlight for the biggest visibility gain, then add LED tail lights and turn signals separately. Just confirm each unit is voltage-compatible with your system before installing.
What causes an LED headlight to shut down after a few seconds?
The most common cause is an incorrect motor profile selected during programming on integrated systems, or a reversed or loose power connection. Re-enter the programming sequence and verify all connections are crimped and fully seated before testing again.