


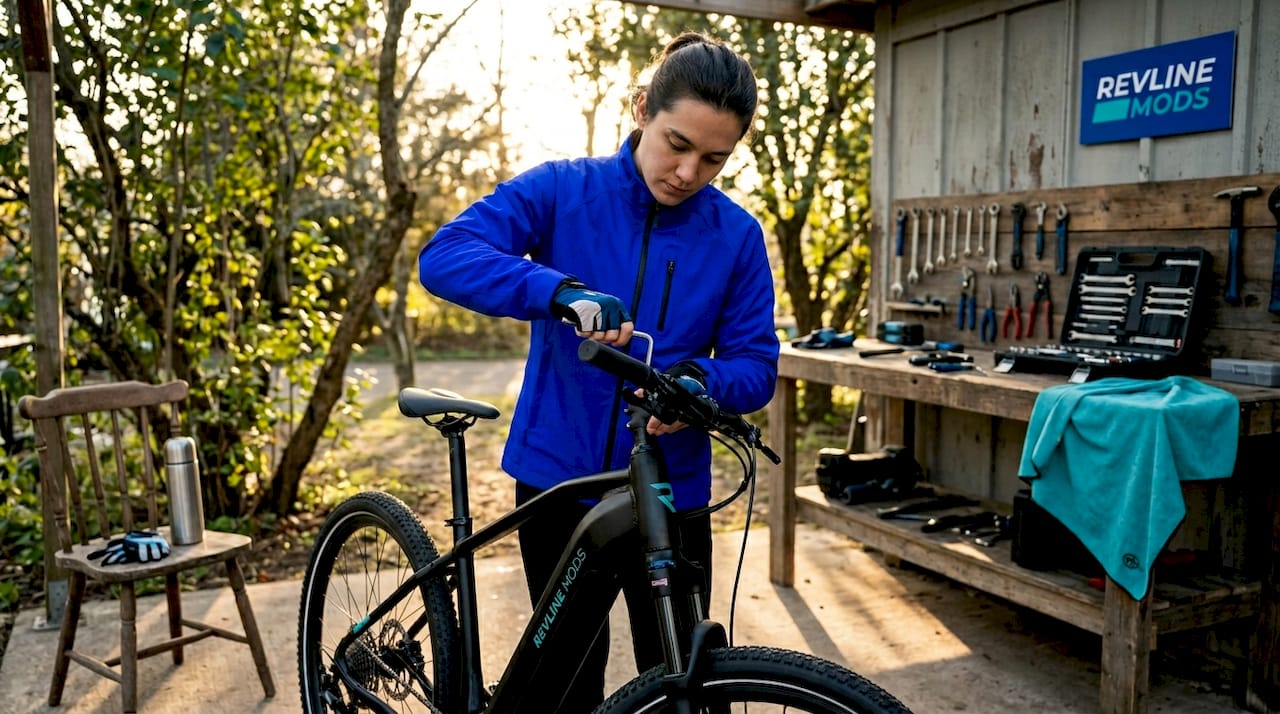
How to Boost Rider Comfort on Your Electric Bike
If you’ve ever finished a ride with numb hands, an aching back, or sore knees, you already know how quickly discomfort can kill your enthusiasm for electric biking. Learning how to boost rider comfort on your electric bike is not about buying the most expensive gear. It starts with proper fit adjustments, smart suspension tuning, and a few well-chosen upgrades that work together. This guide covers every layer of the comfort equation, from saddle height to tire pressure, so you can spend more time riding and less time recovering.
Table of Contents
- Key takeaways
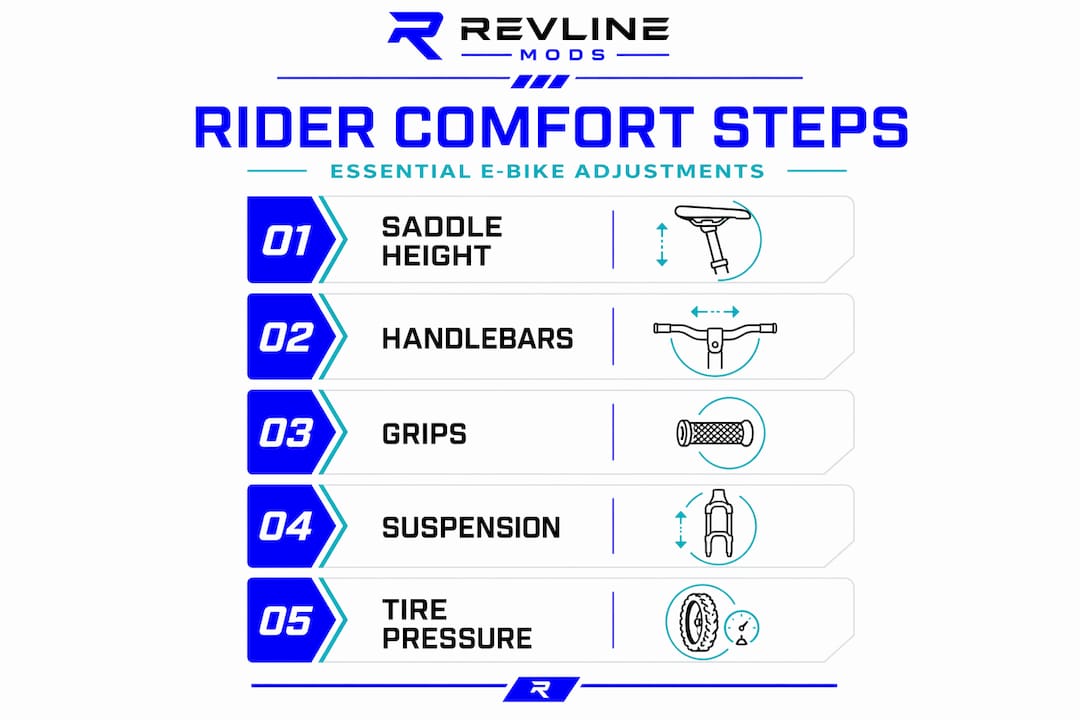
- How to boost rider comfort: start with saddle height
- Handlebar position and grip upgrades
- Suspension and tire pressure tuning
- Upgrading contact points for long rides
- My take on getting e-bike comfort right
- Upgrade your ride with Revlinemods
- FAQ
Key takeaways
| Point | Details |
|---|---|
| Saddle height is foundational | Set knee bend to 25–35 degrees at the bottom pedal stroke before any other adjustment. |
| Handlebars affect your whole body | Position bars at or above saddle height to prevent hunching and reduce wrist strain. |
| Suspension is tunable, not fixed | Adjust preload and lockout settings based on terrain and load for maximum ride quality. |
| Tire pressure is your fastest fix | Running near the lower recommended PSI absorbs vibration immediately and costs nothing. |
| Upgrades complement proper fit | Ergonomic grips, padded gloves, and suspension seatposts amplify comfort only after fit is dialed in. |
How to boost rider comfort: start with saddle height
Saddle position is the single most impactful adjustment you can make. Everything else, including suspension and grips, works better when your saddle height is correct. When it is wrong, no amount of padding fixes knee pain or hip rocking.
The target is a knee bend of 25–35 degrees at the bottom of the pedal stroke. Two reliable starting methods get you close fast. The heel method: sit on your bike, place your heel on the pedal at the six o’clock position, and adjust the seat until your leg is fully extended with no hip rocking. The LeMond formula: multiply your inseam length in centimeters by 0.883 to get your saddle height measured from the center of the bottom bracket to the top of the saddle.
Once you have a starting point, make changes in 2–5 mm increments and test each adjustment with a short ride. Larger jumps make it hard to isolate what is actually helping.
Common signs your saddle height is off
- Hip rocking side to side: saddle is too high
- Knee pain at the front: saddle is too low
- Knee pain at the back or hamstring tightness: saddle is too high
- Numbness or pressure under the sit bones: saddle may be tilted incorrectly
Fore-aft position matters just as much as height. Slide the saddle forward or back so your knee sits directly over the pedal spindle when the cranks are horizontal. This alignment protects your knees and keeps your pedaling efficient.
On saddle tilt, a level or slightly nose-down angle relieves pressure on soft tissue without causing you to slide forward and overload your wrists. Tilt adjustments are small. A one-degree change makes a real difference over a 30-minute ride.
Pro Tip: Mark your current saddle position with a piece of tape before making any changes. If a new setting feels worse, you can return to the baseline instantly.
| Saddle adjustment | What it affects | How to check |
|---|---|---|
| Height | Knee health, pedaling power | Knee bend at bottom stroke (25–35 degrees) |
| Fore-aft position | Knee alignment, power transfer | Knee over pedal spindle, horizontal cranks |
| Tilt angle | Soft tissue pressure, wrist load | Level or very slightly nose-down |
Handlebar position and grip upgrades
Handlebars are your connection to the front end of the bike, and they influence your shoulders, neck, wrists, and back simultaneously. A handlebar that is too low forces you to hunch over and loads your lower back. One that is too far forward overstretches your arms and puts excess pressure on your palms.
The general rule: set your handlebar height at or above saddle level to keep your torso upright and your spine neutral. Most electric bikes allow height adjustment through a stem riser or stem angle change. If you feel any tension in your neck or upper back after 20 minutes of riding, your bars are almost certainly too low.
Brake lever and grip angle follow the same logic. Set them roughly parallel to the ground, or with a slight downward tilt toward your natural wrist position. Your wrists should feel relaxed and neutral, not bent upward or cocked sideways.
Choosing the right grips
Standard grips that come with most electric bikes are designed to be inexpensive, not comfortable. Swapping them out is one of the highest-value upgrades for long-ride comfort. Ergonomic locked-on grips distribute palm pressure across a wider surface area and eliminate the pressure point that develops at the end of a bare grip. Look for grips with a palm rest or wing that supports the meaty part of your hand.
Grips priced in the $20–40 range are genuinely effective and require no tools beyond a hex key. This is one of the most cost-efficient upgrades you can make before spending money on suspension or saddle components.
Pro Tip: When testing a new handlebar height or angle, ride the same route you normally do before deciding. Comfort at a standstill in the garage is not the same as comfort under load at speed.
Suspension and tire pressure tuning
This is where many riders leave the most comfort on the table. They set up their suspension once and never touch it again, regardless of terrain, rider weight, or cargo load. Treating suspension as a tunable system per terrain and load is what separates a genuinely comfortable ride from one that just tolerates bumps.
Understanding preload and lockout
Preload controls how stiff or soft the fork or rear shock feels under your weight. Increasing preload firms the suspension and reduces sag. Decreasing it softens the ride. On rough or gravel terrain, softer settings absorb impacts before they reach your hands and spine. On smooth pavement, firmer settings improve pedaling efficiency and handling precision.
Lockout is different. It firms the fork completely, eliminating suspension movement entirely. Use lockout only on smooth surfaces where you do not need bump absorption. Engaging lockout on rough terrain transmits every impact directly through the frame and can damage the fork over time.
Tire pressure and width
Tire pressure is arguably the fastest comfort lever you have. Wider tires (45–60 mm) running near low recommended PSI absorb road vibration significantly better than narrow, firm tires. The tire acts as a first layer of suspension before any fork movement occurs.
Check your tire’s sidewall for its recommended pressure range. Start at the lower third of that range for daily riding and add a few PSI if you feel the tire squirming in corners. You get most of the comfort benefit without meaningfully raising flat risk.
Rider weight and cargo affect pressure tuning significantly. If you normally ride solo at lower pressures, add PSI when carrying a passenger or cargo load. Soft pressures that feel great alone can feel unstable and wallowy under a heavier load.
Pro Tip: Carry a small digital tire gauge on rides. Tire pressure drops about 1–2 PSI for every 10-degree Fahrenheit drop in temperature, so a setup that works in summer may feel harsh in fall.
| Setting | Rough terrain | Smooth pavement | Heavy load |
|---|---|---|---|
| Fork preload | Softer | Firmer | Firmer |
| Lockout | Off | On | Off |
| Tire pressure | Low range | Mid range | Upper range |
For more detail on off-road suspension tuning, the interaction between preload settings and handling is worth understanding before making big changes.
Upgrading contact points for long rides
Once your fit and suspension are solid, targeted accessory upgrades pay real dividends on rides longer than an hour. The three contact points that matter most are your hands, your feet, and your seat.
- Ergonomic grips with palm support spread pressure across a wider surface and reduce the numbness that builds up in the ulnar nerve over time. Locked-on designs do not rotate under load, which keeps your wrist angle consistent throughout the ride.
- Padded cycling gloves add another layer of vibration absorption between your palms and the bars. They are especially effective on bikes without suspension forks, where bar vibration is more direct.
- Supportive cycling shoes with a stiff sole transfer pedaling power efficiently and prevent your foot from flexing painfully over the pedal. Soft-soled shoes create a pressure point right where the pedal cage contacts the arch.
- Comfort saddles with a central pressure relief channel reduce perineal pressure on longer rides. Width matters too. A saddle that matches your sit-bone width is far more comfortable than one that is generically wide and padded.
- Suspension seatposts are particularly useful if your frame has no rear suspension. A suspension seatpost reduces back and hip impact from small bumps that a fork cannot address, making them a solid upgrade on hardtail-style electric bikes.
The key principle is layering. No single upgrade fixes everything. Grips help hands. Shoes help feet. A good saddle helps your sit bones. Together, they create a comfortable riding position that holds up over distance.
Pro Tip: Before buying a new saddle, visit a local bike shop and ask to sit on demo saddles to measure your sit-bone width. It takes five minutes and prevents a $60 mistake.
My take on getting e-bike comfort right
I’ve watched a lot of riders spend money on suspension forks and premium saddles before ever touching their saddle height or handlebar angle. Every single time, they left significant comfort on the table. In my experience, fit adjustments account for at least 60% of total ride comfort, and they cost nothing.
The saddle height insight that changed my perspective: a 5 mm error in saddle height feels like almost nothing during a 10-minute ride but compounds into real knee strain over an hour. Riders dismiss small adjustments because the benefit is not immediate. It shows up 45 minutes in.
What I’ve learned about suspension is that most riders treat it like a fixed feature of the bike. They set it in the parking lot once and forget about it. But the right e-bike suspension setup for a 160-pound rider on smooth pavement is completely wrong for that same rider on gravel or carrying cargo. Adjusting preload takes 30 seconds and completely changes how the bike feels.
My honest take: ergonomic grips and padded gloves are genuinely useful, but they are amplifiers, not foundations. If your saddle is too high and your bars are too low, no amount of gel padding will fix the strain those positions create. Get the fit right first. Then layer in the upgrades. That sequence is what actually produces a comfortable, confidence-inspiring ride.
— Revline
Upgrade your ride with Revlinemods
Everything covered in this guide, from handlebar position to suspension tuning, becomes even more effective when you pair those adjustments with quality aftermarket hardware.

At Revlinemods, we carry upgrade components built specifically for electric motorcycle and off-road e-bike riders who want real performance gains, not generic accessories. The Chrome Direct Stem gives you precise handlebar positioning that stock stems simply cannot match. For riders looking to transform their setup from the ground up, the 79 Bike Black Out Kit bundles hardware upgrades that complement every ergonomic improvement you make. Browse the full catalog at Revlinemods and find the parts that fit your build.
FAQ
What is the correct saddle height for electric bike comfort?
Set your saddle so your knee has a 25–35 degree bend at the bottom of the pedal stroke. Use the heel method or LeMond formula as a starting point, then fine-tune in 2–5 mm increments.
How do I reduce hand numbness on long e-bike rides?
Swap stock grips for ergonomic locked-on grips and add padded cycling gloves. Also check that your handlebar height is at or above saddle level to reduce weight loading on your palms.
What tire pressure should I run for a more comfortable ride?
Start near the lower end of your tire’s recommended pressure range. Wider tires (45–60 mm) at lower PSI absorb significantly more vibration than narrow tires run at high pressure.
When should I use the lockout setting on my e-bike fork?
Use lockout only on smooth, paved surfaces where bump absorption is not needed. Engaging lockout on rough terrain transmits harsh impacts through the frame and can damage the fork.
Does rider weight affect suspension and tire pressure setup?
Yes. Heavier riders and loaded bikes need higher tire pressure and firmer suspension preload for stability. Settings optimized for solo riding can feel unstable when carrying cargo or a passenger.