


How to modify electric bike hardware for peak performance
Hardware upgrades on a Surron or Talaria are not just bolt-on exercises. They are system-level decisions that ripple through your controller, battery, wiring, brakes, and suspension all at once. Get it right and you unlock a machine that genuinely outperforms its stock form in every measurable way. Get it wrong and you are looking at fried controllers, brake fade at the worst possible moment, or a bike that is suddenly illegal on the trails and roads you ride every day. This guide cuts straight to the strategies, sequences, and precautions that experienced builders use to get real gains without burning up hardware or voiding every safety margin they started with.
Table of Contents
- What you need before you start
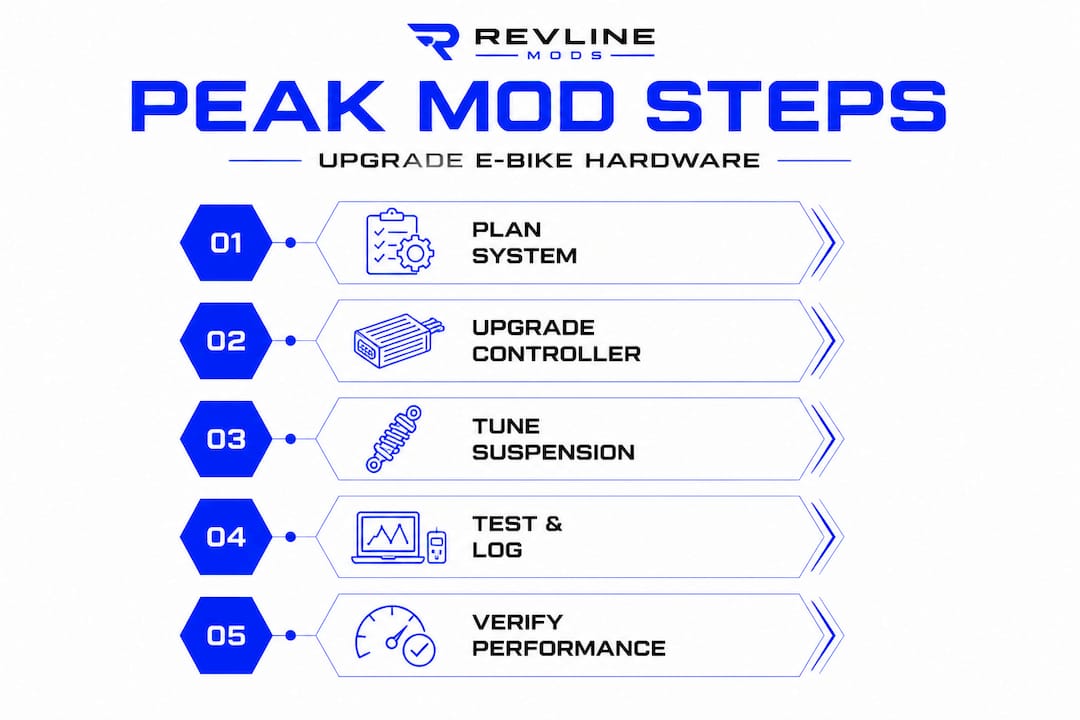
- Step-by-step guide: Key hardware upgrades
- Common mistakes and how to avoid them
- Testing, verifying, and fine-tuning your mods
- Expert perspective: Why system thinking wins for e-bike hardware mods
- Upgrade your electric bike with premium hardware
- Frequently asked questions
Key Takeaways
| Point | Details |
|---|---|
| Think system-wide | Every hardware change impacts the entire e-moto so plan upgrades as interconnected steps. |
| Start with suspension | Dialing in sag, damping, and spring rate handles extra e-moto power for better control and safety. |
| Upgrade safely | Increase power or bypass limits only after upgrading supporting hardware like brakes, wiring, and battery protection. |
| Test and verify | Carefully test and fine-tune after each mod to catch safety issues and optimize performance gains. |
What you need before you start
The single biggest mistake enthusiasts make is treating each mod as an isolated task. Swap a controller, add voltage, and suddenly your stock wiring is running hotter than it was rated for. Upgrade the motor without touching the brakes and you have more speed than your stopping power can handle. A system mindset is not optional here. Any change in controller output, battery voltage, or firmware directly affects thermal limits, supporting hardware ratings, and even the legal classification of your bike.
Before you touch a single bolt, build out your preparation checklist.
Essential tools and supplies:
- Torque wrench (metric, 5 Nm to 60 Nm range)
- Quality hex key set and T-handle drivers
- Multimeter with temperature probe capability
- Laptop with USB interface cable for controller flashing
- Heat-resistant electrical tape and quality connectors (XT60 or XT90)
- Threadlocker (blue grade for most fasteners)
- Cable ties and split loom for wiring management
- Fire-resistant work mat for battery work
Safety gear for the build:
- Insulated gloves rated for at least 60V DC
- Safety glasses
- Fire extinguisher within reach during any battery or wiring work
Documentation is non-negotiable. Before you change anything, photograph every connector, record every factory setting in your controller software, and note your baseline suspension sag measurements. If you are considering upgrading the battery lid as part of a broader build, document the stock fitment first so you have a clean reference point.
“Treat your stock configuration like a save file in a video game. You need to be able to reload it if something goes wrong.”
Pro Tip: Create a build log in a simple spreadsheet. Track every change, the date, the part number, and the result. Builders who skip this step spend twice as long troubleshooting when something goes sideways three mods later.
The system overview matters because electric bikes like the Surron Light Bee and Talaria Sting run tightly integrated electronics. The battery management system (BMS), controller, motor, and throttle all communicate within narrow tolerances. Pushing one component past its design envelope without upgrading the others is how builds fail.
Step-by-step guide: Key hardware upgrades
With tools and strategy in place, let’s break down the actual hardware modding process.
Controller and firmware tuning
Firmware tuning can change throttle response, speed cut-off, and assist behavior, but pushing current or voltage too high increases heat and risk in ways that compound quickly. The correct sequence matters.
- Back up the factory firmware before connecting any flash tool. Use your controller’s native software (KT, Votol, or APT depending on your build) and save the original file with a clear filename and date.
- Start from a safe baseline. Load the stock map and verify the bike runs normally before making any changes. This confirms your flash tool and cable are working correctly.
- Make one change at a time. Increase current limit by no more than 10% per session. Ride, check temperatures, and wait at least 30 minutes before the next adjustment.
- Monitor controller and motor temps after every tuning session. If the controller case exceeds 70°C (158°F) under normal riding, you are pushing past safe limits without additional thermal management.
- Prioritize controller over motor for initial gains. The motor on most Surron and Talaria builds has more thermal headroom than the stock controller. Upgrading to a higher-rated controller first gives you a more reliable foundation.
An upgraded throttle pairs directly with controller tuning. A quality hall-effect throttle gives you cleaner signal resolution, which makes the firmware’s throttle mapping more precise and reduces the jerky low-speed behavior that plagues stock setups.
Suspension tuning for e-moto loads
Suspension setup on Surron and Talaria must start with higher air pressure and firmer sag than traditional bikes, plus extra damping to handle e-power delivery. Electric torque hits differently than a combustion engine. There is no gradual power curve, just instant, full torque from zero RPM.
Sag targets for e-motos vs. traditional bikes:
| Setting | Traditional MTB | E-moto (Surron/Talaria) |
|---|---|---|
| Front sag (% of travel) | 25 to 30% | 20 to 25% |
| Rear sag (% of travel) | 25 to 30% | 18 to 22% |
| Rebound damping | Medium | Medium-firm |
| Compression damping | Medium | Firm |
Set sag with full riding gear on the bike. Measure from axle to a fixed reference point, then compare unloaded vs. loaded numbers. Adjust air pressure in 5 PSI increments and recheck. For rebound, start at the fully open position and click in (add damping) until the wheel tracks rather than bounces off small square-edged hits.
Speed limiter bypass
Bypassing speed limiters can affect bike legality, part stress, and safety in ways that are not always obvious until something fails. The two main methods are firmware-based removal (editing the controller map) and hardware bypass (cutting or bridging the speed sensor wire).
Firmware removal is cleaner and reversible. Hardware bypass is faster but harder to undo and can confuse the controller’s error detection. Either way, removing the limiter increases sustained load on the motor, controller, and drivetrain. If your wiring, connectors, and battery are not rated for the higher continuous draw, you will see failures within hours of hard riding.
Pro Tip: Only remove the speed limiter after you have already upgraded your brakes, verified your wiring is rated for the higher current, and confirmed your controller can handle the sustained load. A brake kit upgrade is not optional at this stage. It is a prerequisite.
After each major change, run a controlled test before the next mod. Ride at low speed in a safe area, check temps, listen for unusual sounds, and verify brake response. Do not stack multiple changes without a test ride between them.
Common mistakes and how to avoid them
Each upgrade presents hazards, so knowing the top mistakes keeps your project and investment safe.
Thermal overload is the most common failure mode. Pushing voltage or current beyond stock hardware limits without upgrading cables, BMS, and thermals leads to overheating and component failures that often happen suddenly and without warning. Signs to watch before damage occurs include controller cases that are too hot to touch after short rides, motor windings that smell like burning varnish, and wiring connectors that show discoloration or melting.
Ignoring supporting hardware is the second most common failure. Builders focus on the controller or motor and forget that the brakes, connectors, and wiring are now operating under higher stress. Upgrading brakes for higher power is not a cosmetic choice at higher power levels. It is a functional safety requirement.
Common mistakes checklist:
- Flashing firmware without backing up the original file
- Increasing voltage without checking BMS rating
- Running stock connectors (XT30 or bullet) at higher current loads
- Skipping a test ride between successive mods
- Not checking torque specs on suspension linkage after adjustments
- Ignoring brake bleed intervals after power upgrades
Missing legal ramifications catches many builders off guard. Modifying power output or removing speed limiters can reclassify your bike from a low-power electric vehicle to an unlicensed motorcycle in many jurisdictions. This affects where you can ride, whether your insurance is valid, and what happens if you are involved in an incident.
“The most expensive mod you can make is one that turns your bike into a liability instead of an asset.”
Firmware overwrite mistakes are recoverable only if you backed up first. If you flash a corrupt or incompatible file without a backup, you may brick the controller entirely. Always verify the firmware file against your exact controller model and firmware version before flashing. When in doubt, contact the controller manufacturer’s support before proceeding.
Pro Tip: Keep a dedicated USB drive with your original firmware backup, build log, and controller software installer. Label it clearly and store it somewhere you will not lose it.
Testing, verifying, and fine-tuning your mods
Successfully upgrading hardware is only half the battle. Testing and adjusting is what delivers the results.
Initial test ride checklist:
- Ride at 25% throttle for the first 5 minutes
- Check controller temperature after the first run
- Verify brake lever feel and stopping distance
- Listen for unusual motor or drivetrain sounds
- Check all fasteners for movement after the first ride
- Inspect wiring and connectors for heat or discoloration
Suspension progression and tuning can be iterated by measuring sag, rebound, and ride results under real e-moto loads. Do not tune suspension on a stand. Tune it on the actual terrain you ride. A setting that feels perfect on smooth ground may cause instability on the chunky, rooted trails where Surrons and Talarias thrive.
Telemetry and measurement basics:
| What to measure | Tool needed | Target range |
|---|---|---|
| Controller temp | IR thermometer or probe | Below 65°C during riding |
| Motor temp | Temp probe or app (if supported) | Below 80°C sustained |
| Battery voltage sag | Multimeter under load | Less than 5% sag |
| Brake rotor temp | IR thermometer | Below 300°C after hard stops |
| Suspension sag | Tape measure, zip tie on stanchion | Per table in Section 3 |
Signs of a problem that require you to stop and diagnose before continuing include any burning smell from the motor or controller, brake lever that goes soft or spongy mid-ride (a sign of brake fade or air in the line), sudden power cuts that were not present before the mod, and any handling instability that was not there before.
The adjustment and iteration process works best when you change one variable, test it thoroughly, record the result, and then move to the next. Riders who try to tune suspension, firmware, and brakes simultaneously end up with no clear picture of what actually improved the bike.
Pro Tip: Use brakes for test rides that are already bedded in and verified before you start testing other mods. Unknown brake performance adds a dangerous variable to an already complex testing process.
Expert perspective: Why system thinking wins for e-bike hardware mods
Most builders who struggle with hardware mods share one pattern. They chase a single upgrade, usually the controller or a speed limiter bypass, and treat everything else as secondary. The result is a bike that is faster in a straight line but worse in every other way. Brakes that cannot handle the speed, suspension that cannot absorb the torque, and wiring that runs hot enough to cause intermittent failures at the worst possible time.
The builders who get it right think in systems from the start. They plan the controller upgrade alongside the brake upgrade, the suspension tune alongside the wiring audit. A system mindset is not just a safety precaution. It is the actual reason their builds perform better and last longer than the piecemeal approach.
Real field failures almost always trace back to one skipped step. A builder adds 20% more current to the controller but keeps the stock XT30 connectors. Three hard rides later, a connector melts and takes out the BMS. Another builder tunes the firmware for maximum speed but does not recheck suspension sag with the new power delivery. The bike handles fine at moderate speed but becomes unpredictable at the top end where the suspension is now undersprung for the load.
Experienced builders always double-check three things after any major mod: thermal performance under real load, brake response at the new top speed, and suspension behavior at both ends of the power range. Brake upgrades for complete builds are not the last item on the list. They are a parallel track that runs alongside every other upgrade.
The uncomfortable truth is that a well-balanced stock-plus-20% build will outperform a poorly integrated stock-plus-50% build in every real-world riding scenario. Balance beats raw numbers every time.
Upgrade your electric bike with premium hardware
Building a high-performance Surron or Talaria requires parts that are engineered specifically for the demands of electric off-road riding. Generic aftermarket parts introduce tolerances and failure modes that purpose-built components eliminate.

At Revline Mods, every component in our catalog is selected for compatibility with the system-level builds this guide describes. Whether you are starting with a Supermoto wheelset for a complete rolling chassis upgrade, adding brake upgrades that match your new power output, or installing an advanced throttle to get cleaner signal resolution from your tuned controller, you will find parts that are matched to your specific platform. We stock components for Surron, Talaria, 79Bike, and more, with fast shipping and a team that understands what these builds actually demand.
Frequently asked questions
Is it legal to increase my e-bike’s power or bypass the speed limiter?
Changing power or removing speed limits can reclassify your bike as an unlicensed motor vehicle, making it illegal on public roads and trails. Always verify your local regulations before modifying power output or speed limits.
What is the first hardware mod I should consider for a Surron or Talaria?
Suspension tuning is the highest-impact starting point because e-moto torque demands require firmer sag and more damping than traditional bikes, and getting this right improves every other aspect of performance. Better handling makes every subsequent mod safer to test.
How do I avoid damaging my controller when increasing voltage or current?
Increase current in small increments, monitor controller temperatures after every session, and always upgrade your wiring, connectors, and BMS in parallel. Pushing beyond stock hardware limits without thermal and electrical upgrades is the primary cause of controller failures.
What supporting hardware is required for high-power mods?
Controller changes that increase current or voltage require upgraded brakes, higher-rated connectors, compatible BMS, heavier gauge wiring, and properly tuned suspension to handle the new power delivery safely and reliably.